In the past, websites consisted of simple static pages with information. These days, website owners are looking for ways on how to build a website with user accounts for a variety of reasons.
For example, you can let visitors create user accounts on your website in order to generate user engagement, encourage user-submitted content, or make your website more community-oriented. It’s also a great way to manage the information that different users are able to see on your website and provide exclusive content to paying members.
Profile Builder Pro is an all-in-one user registration and management plugin for WordPress, that makes it easy to create a website with user accounts. You can integrate it with other plugins, add-ons, and tools to add advanced features to your site. For example, you might consider creating a member directory or user listing. This way, members can connect with one another and set up their own public profile. Users can easily create their own account.
In this article, we’ll show you how to build a website with user accounts in WordPress using the Profile Builder Pro plugin. We’ll also explain how you can integrate it with Paid Member Subscriptions to offer paid user accounts.
How to build a website with user accounts using the Profile Builder Pro plugin
Here, we’ll dive into how to build a website with user accounts using this user friendly plugin, without having to mess around with any code. You’ll be able to create beautiful front-end registration and profile forms, allowing users to register and create their own profile on your website. We’ll go through ways of eliminating user registration spam, customizing user emails as well as setting up a member directory of user profiles.
Once you’ve grown your community Profile Builder gives you options of monetizing your community. You can setup content restriction to registered users only, as well as ask users to pay for an account at registration.
Let’s dive in…
Step #1: Set up a Login, Register, and Edit Profile pages
Once you install and activate the Profile Builder Pro plugin on your WordPress site, you can use the start wizard to set up a user login page, register page, and edit profile page. To launch the wizard, go to Profile Builder from the admin panel and click the Create Form Pages button.
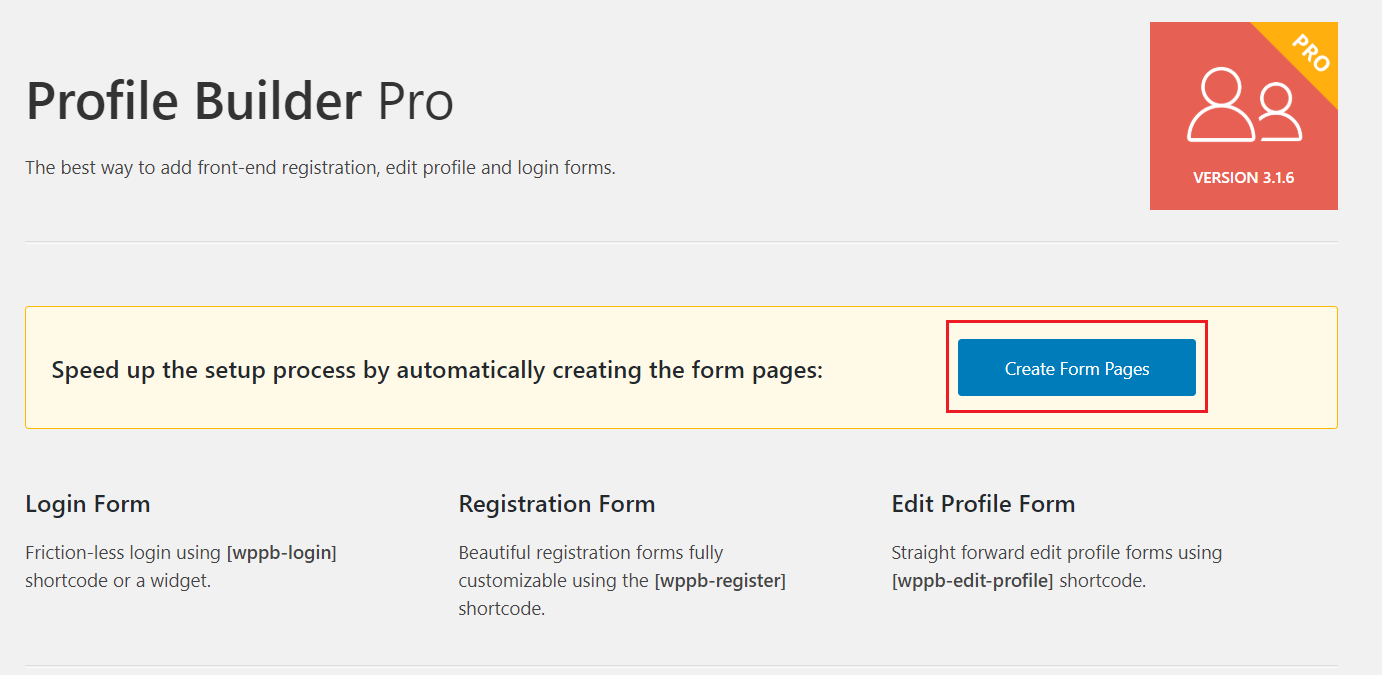
Profile Builder will automatically create three pages on your website: Log In, Register, and Edit Profile as shown in the screenshot below:

Your site’s visitors can use these pages to create and manage their user accounts. Each page displays a different form i.e., login form, registration form, and edit profile form using shortcodes. You can also add the login form to a widget on your website, or use social login to speed things up. However, for some websites, a login page is more intuitive than a login form in a widget.
Step #2: Build multiple registration forms with custom fields
The next step is to build multiple registration forms for the different types of users that can create a user account on your website.
This is useful for collecting different information from different types of users. For example, if you’d like to create a listing of Vendors and Dropshippers, you’d need two registrations forms, and each one would have a different set of questions.
Creating multiple registration forms
Profile Builder Pro’s Multiple Registration Forms module lets you do this in just a few simple steps. Here’s what you need to do:
Go to Profile Builder > Modules from the WordPress website admin panel and make sure the Multiple Registration Forms module is set to Active.

Next, head over to Profile Builder > Registration Forms to create as many custom registration forms as you’d like. Click the Add New button to get started.
You can choose what user role the registrant will be assigned after they complete their registration. Additionally, you can decide whether users are automatically logged in after registration and, if so, which web page to redirect them to (such as the homepage).
Once that’s done, use the Add New Field to the List meta box to create the registration form.

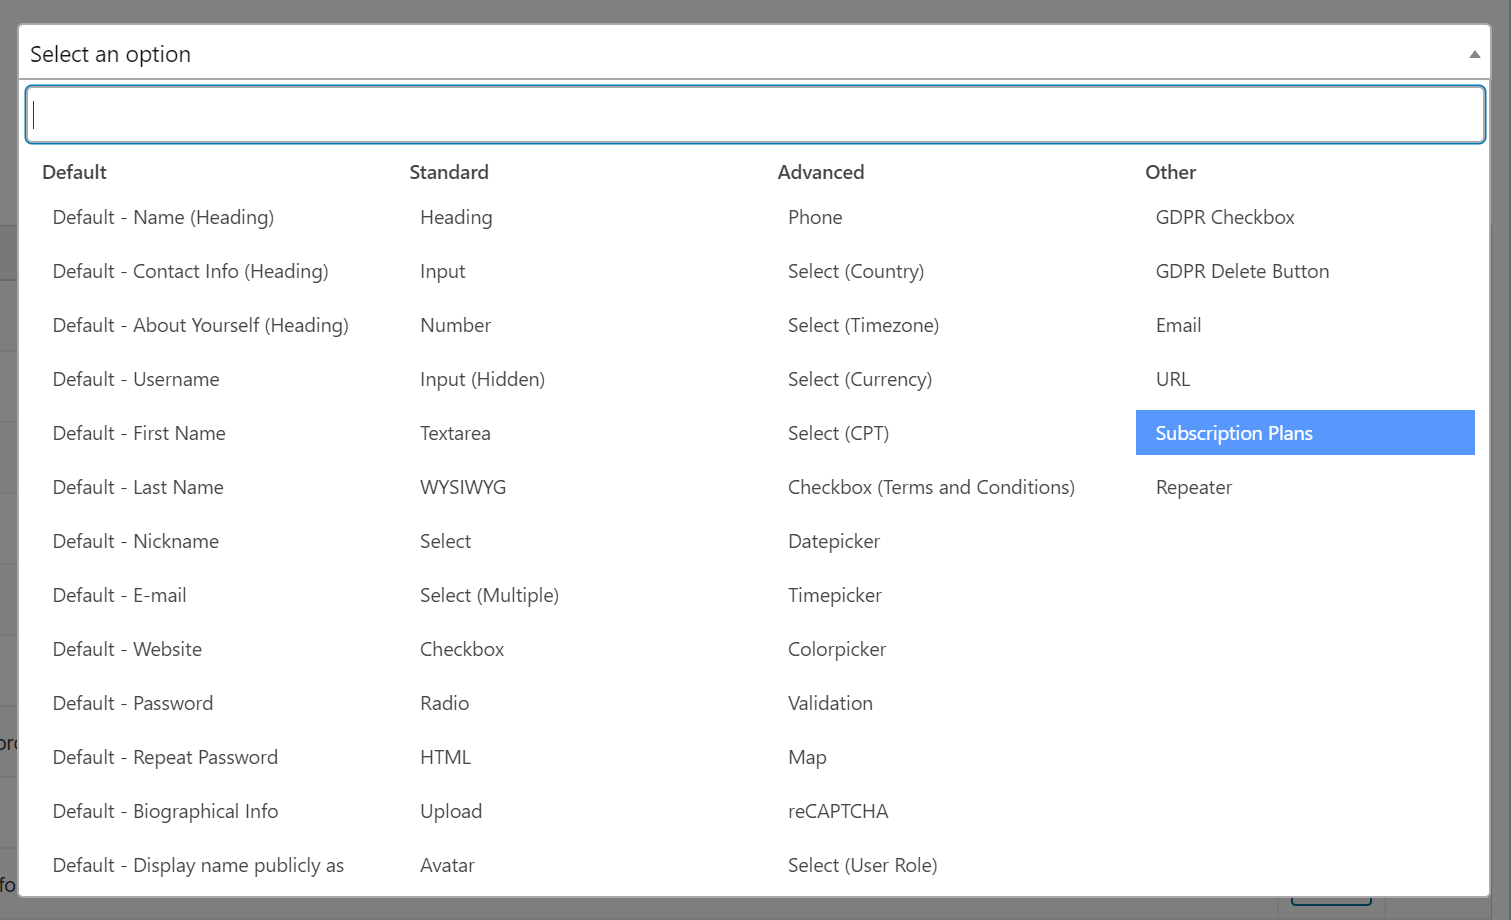
You can add or remove any of the supported user fields from the registration form. These are managed under the Form Fields tab where you can configure repeater fields and conditional logic (and much more!) for the different form fields.
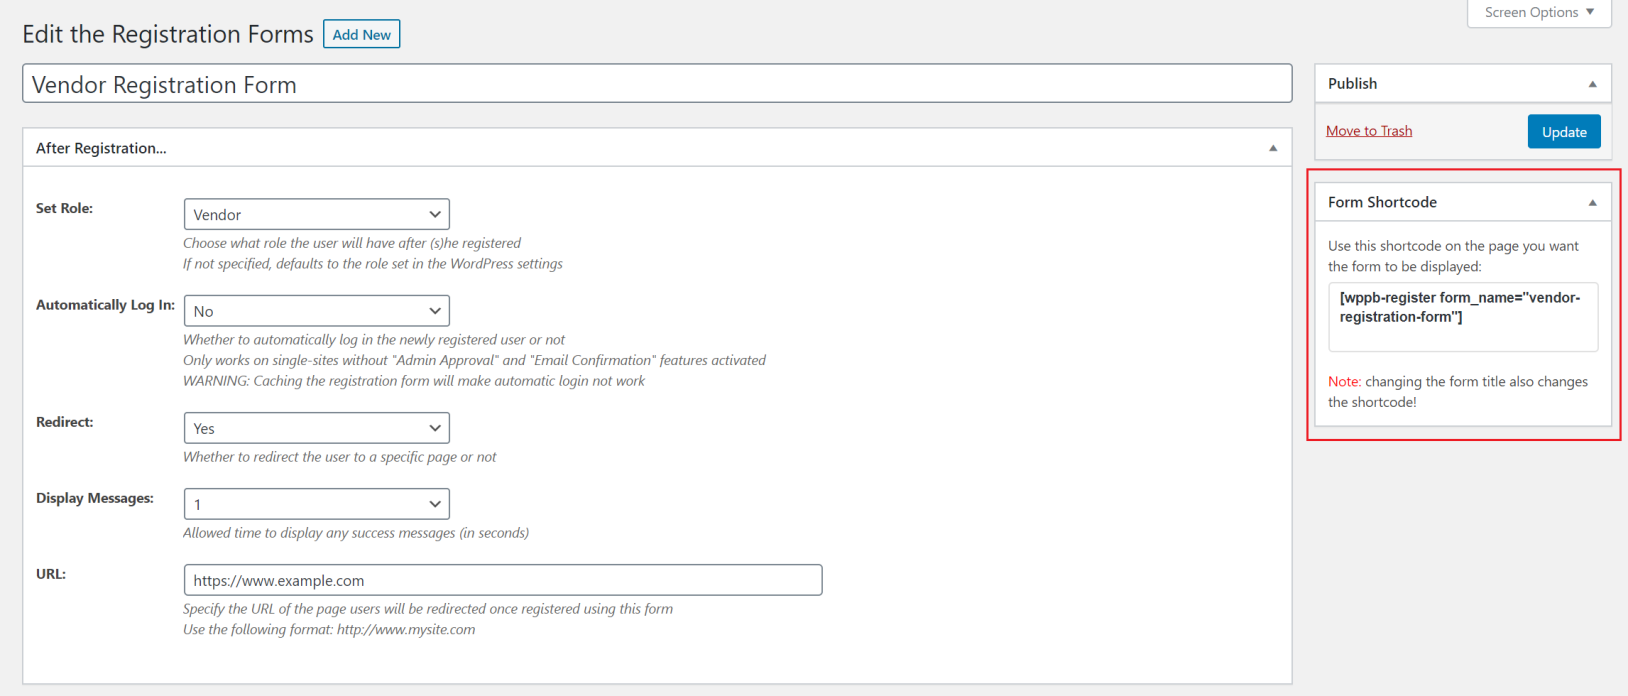
Once you’ve created your form, click the Publish button to proceed. A shortcode will appear under the Form Shortcode meta box. You can add this to any page on your website to display the registration form on the front-end.

Repeat these steps to create as many registration forms as you’d like. User registration data is automatically saved to your database, so you can easily collect relevant user information.
Step #3: Configure email confirmation, reCAPTCHA, and admin approval
One of the neat features on offer with the Profile Builder Pro plugin is that it comes with built-in functionality to help you fight off registration spam. This is especially important for website owners who are looking for ways on how to build a website with user accounts while keeping it secure.
To get started, head over to Profile Builder > Settings > General Settings and make sure both the “Email Confirmation” Activated and “Admin Approval” Activated options are set to Yes.
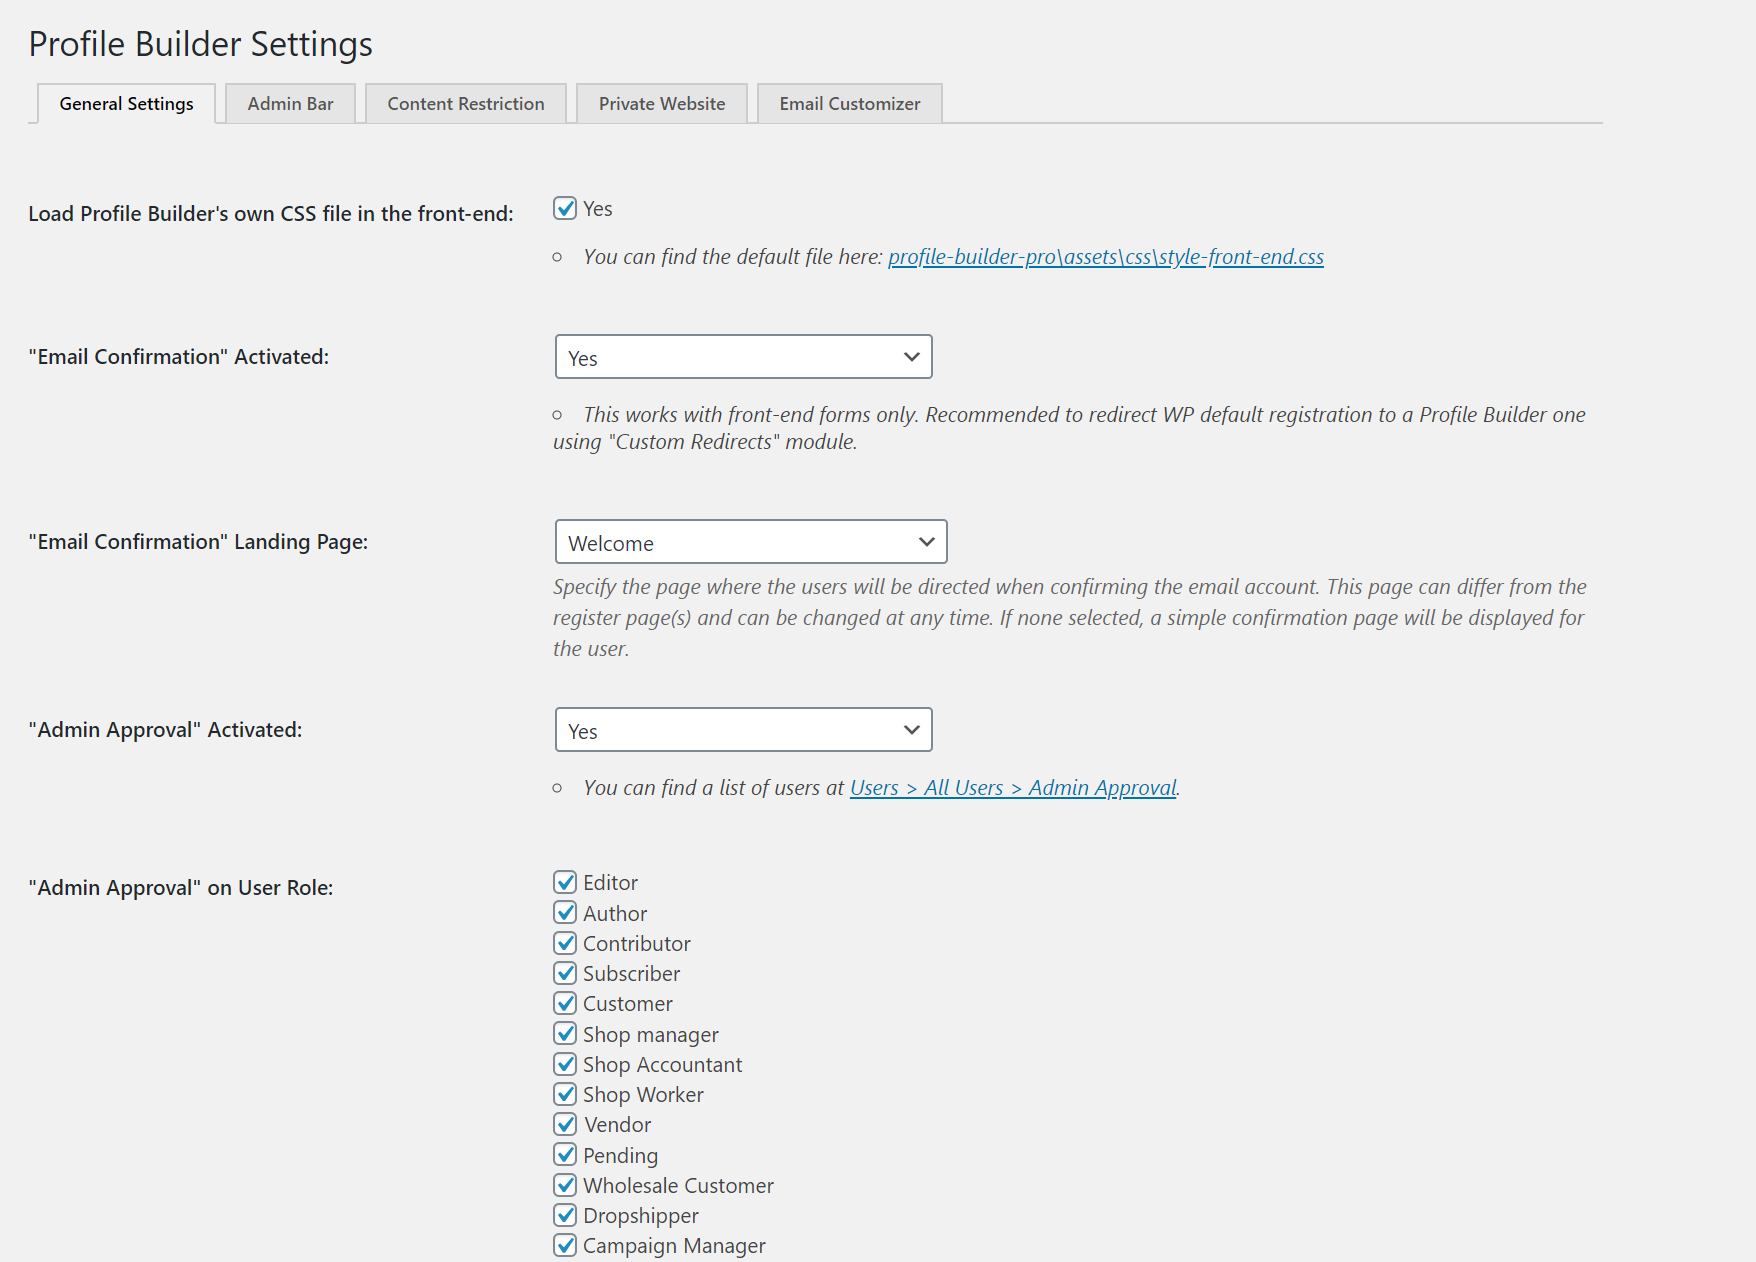
You can also select the “Email Confirmation” Landing Page and select which user roles to activate admin approval on using the “Admin Approval” on User Role option.
Profile Builder Pro also lets you fight spam by adding a reCAPTCHA field to your registration forms. You can configure this under the Form Fields tab. For step-by-step instructions, check out our tutorial on how to add reCAPTCHA to your forms.
Step #4: Create profile forms and pages
The next step in how to build a website with user accounts is to give registered users the option to edit their profiles. For this, you’ll need to create a profile form and add it to an edit profile page.
Profile Builder Pro comes with a variety of default fields and advanced custom fields that you can use to build your profile forms. You can easily manage the form fields that appear in your form from the Form Fields tab.
One of the standout features on offer with Profile Builder Pro is that your registration form and profile forms don’t necessarily have to be identical. For example, you can give users the option to upload an avatar after they’ve registered. Or, you might want to prevent users from updating their email address in which case you could remove the Email form field from the profile form.
Check out our tutorial on how to create your WordPress custom profile page for step-by-step instructions.
Step #5: Create a member directory with user profiles
Profile Builder Pro’s User Listing module lets you create a front-end member directory with user profiles.
Go to Profile Builder > Modules from the WordPress admin panel and make sure the User Listing module is set to Active.

Next, go to Profile Builder > User Listing and click the Add New button. From the User Listing Settings meta box, select the Roles to Display by ticking the checkboxes. For example, if you want to display a list of vendors only, you’d simply tick the checkbox next to Vendor.

You can also configure advanced options from the same screen. For example, you can decide how many users to list per page, the sorting criteria, and more.

Click the Publish button to continue. Copy-paste the shortcode on the page you’d like to display the user listing on.
Step #6: Restrict user access to content
When you’re looking for ways on how to build a website with user accounts, you might also consider restricting user access to content. The Profile Builder Pro plugin comes with built-in options to help you restrict content based on the logged-in status or user role.
Head over to Profile Builder > Settings > Content Restriction to get started. Set the Enable Content Restriction option to Yes using the dropdown. Once that’s done, you can choose the type of content restriction you’d like to apply and customize the content restriction messages using WYSIWYG text editors. If you select the Redirect option, you can also choose to redirect users to a specific URL such as your homepage.

Click the Save Changes button to proceed.

The next step is to set up content restriction rules. Go to the page or post you’d like to restrict access to. Scroll down till you reach the Profile Builder Content Restriction meta box. From here, you can choose to restrict content to logged-in users only or selected user roles.
Step #7: Create paid accounts using Paid Member Subscriptions
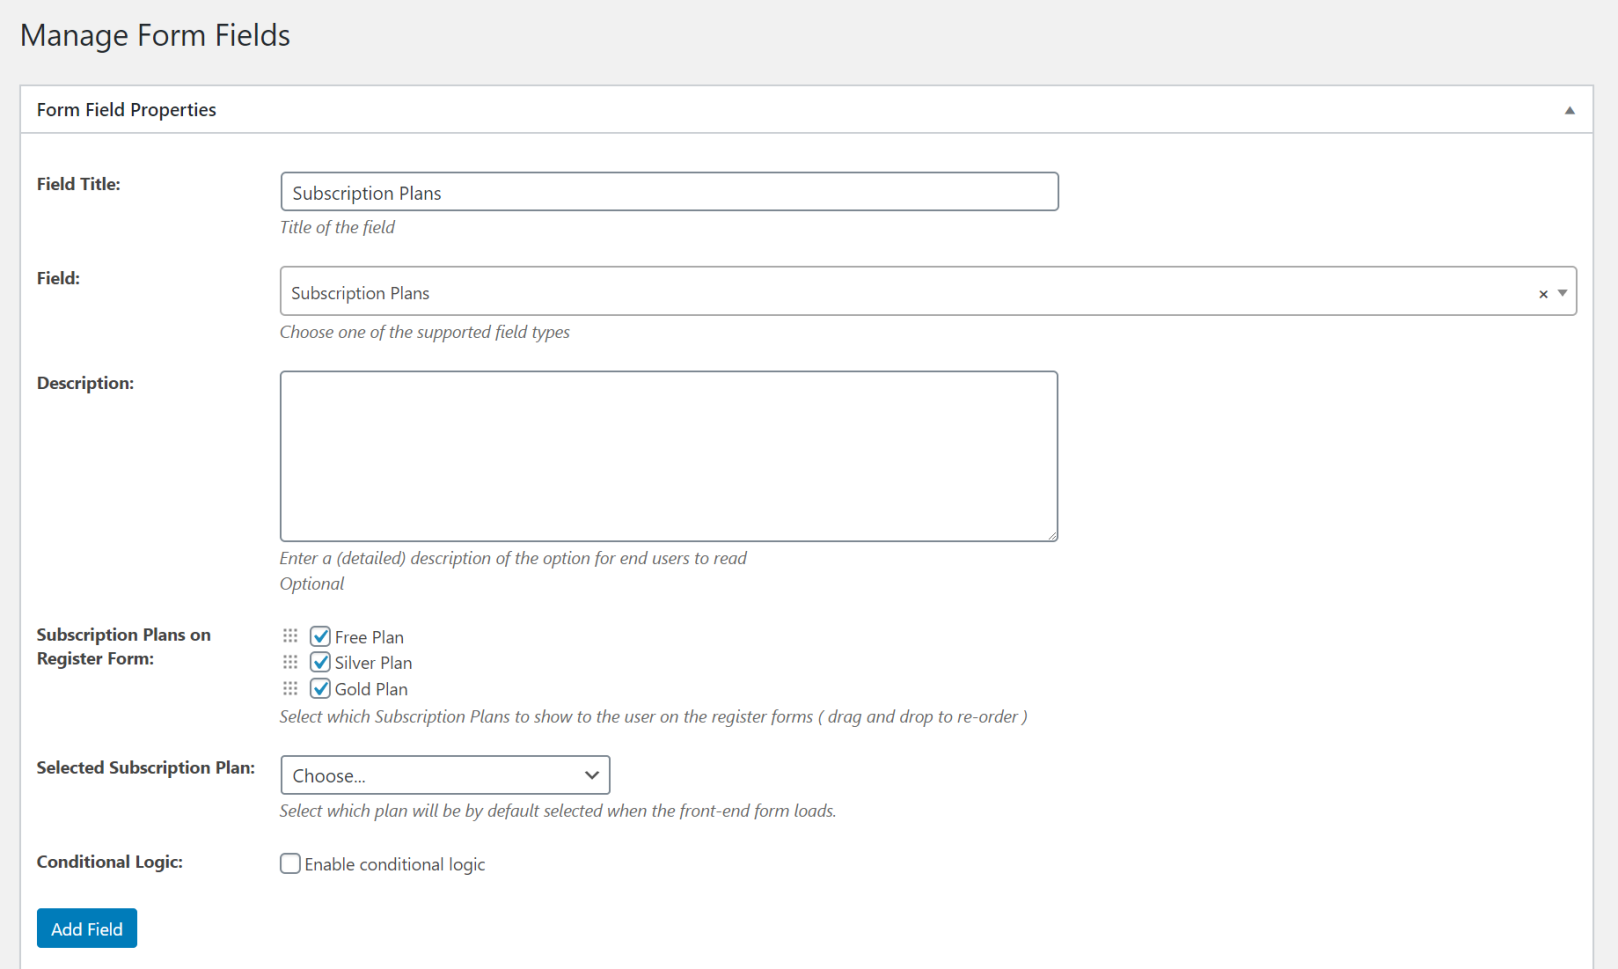
The Profile Builder Pro plugin integrates seamlessly with Paid Member Subscriptions allowing you to use the Extra Field Type, Subscription Plans, to create paid user accounts.
This is especially useful if you’re looking for a way to monetize your WordPress site. You can set up the subscription plans you’d like to sell. Users can then select the plan they’d like to purchase at the time of registration.
The payment for the subscription plan will be initiated after the user confirms their email address. After they do that, they’ll be redirected to the payment processor.

It’s also worth noting that the Subscriptions Plan field supports conditional logic. This means you can display the correct subscription plans based on, for example, user roles.
Build your own website with user accounts
The Profile Builder Pro plugin takes the guesswork out of how to build a website with user accounts in WordPress.
You can create different pages to allow users to create and manage their user accounts and configure security options to fight off registration spam. And, to take things to the next level, the plugin lets you create a member directory, restrict content, set up redirects as well as customize the emails you send your users.
Profile Builder Pro
Create beautiful front-end registration and profile forms with custom fields. Setup member directories, custom redirects, cutomize user emails & more using the all in one user management plugin.
Get the pluginProfile Builder Pro’s integration with the Paid Member Subscriptions plugin also makes it possible for you to enable e-commerce functionality by selling memberships (i.e., paid accounts) complete with subscription plans.
It’s an all-round WordPress user management plugin for anyone looking for ways on how to build a website with user accounts in WordPress.
The post How to Build a Website with User Accounts (Step by Step Tutorial) appeared first on Cozmoslabs.