There are tons of scenarios where you might need to create a custom WordPress registration form for your website. For example, you might need to allow members to register for your membership program, create profiles, sign up for an online course, or create an account to join discussion boards or forums.
Creating a custom WordPress registration form gives you better control over the information you collect from users. In addition to this, you can tweak the form however you’d like to deliver a better user experience or enhance its functionality (for example, by connecting it to your email marketing service of choice). And, finally, you can add as many additional form fields as you’d like.
In this tutorial we’ll go through how to build and customize front-end registration forms in WordPress using the Profile Builder Pro plugin.
Introducing Profile Builder Pro
Profile Builder Pro is an all-in-one user registration and management plugin for WordPress sites. It lets you add beautiful front-end user registration, profile, and login forms to your site using shortcodes. The plugin is fully GDPR compliant right out of the box.
With Profile Builder Pro, you can add all sorts of custom fields to your WordPress user registration forms including agree to terms checkboxes, timezone select, date picker, reCAPTCHA, and color picker as well as avatar upload and a full WYSIWYG editor. The plugin also lets you configure conditional logic for form fields and set up content restrictions based on the user role.
Using the plugin you can also enable admin approval for new user registrations, which is especially useful for private membership sites. In addition to this, it offers neat features like email confirmation for user registration which requires registrants to confirm their email. This is a great way to prevent bot accounts.
You can also enforce minimum password length (and strength) to improve your site’s security and hide the admin bar to deliver an intuitive, distraction-free registration experience.
All these features will be key to building a powerful front-end user registration for your website.
How to create a custom WordPress registration form in WordPress
Let’s dive into how you can use Profile Builder Pro to create custom user registration forms for your WordPress site.
Control over Admin Bar on the Front-end
The Profile Builder Pro plugin lets you decide which user roles can view the admin bar on the front-end of your WordPress website. To configure the admin bar settings, head over to Profile Builder > Settings from the admin panel and click on the Admin Bar tab.

From the Admin Bar Settings screen, you can set the visibility of each user role you have added to your WordPress website to either show or hide.
The key benefit of hiding the admin bar from the front-end for logged-in users is that it lets you deliver a clean and user-friendly interface.
Adding Extra Profile Fields to Registration Forms
The Profile Builder Pro plugin lets you manage default and extra profile fields for user registration directly from the back-end. The default field types include name, contact information, about yourself, username, first and last name, email, website, and others.

However, when creating custom WordPress registration forms, you might need to add extra field types to your forms. You can select from a total of 29 extra form field types including:
- Heading
- Input
- Number
- Textarea
- WYSIWYG
- HTML
- reCAPTCHA
- Avatar upload
- Date picker and time picker
You can manage all forms fields by heading over to Profile Builder > Form Fields from the WordPress admin panel.

The Manage Form Fields screen provides an intuitive user interface for adding, editing, deleting, as well as reordering user registration fields (drag and drop).

Once you select a form field type, you can easily configure the field properties. This includes the form field’s title, type, meta-name, description, default value, and whether or not it’s required.
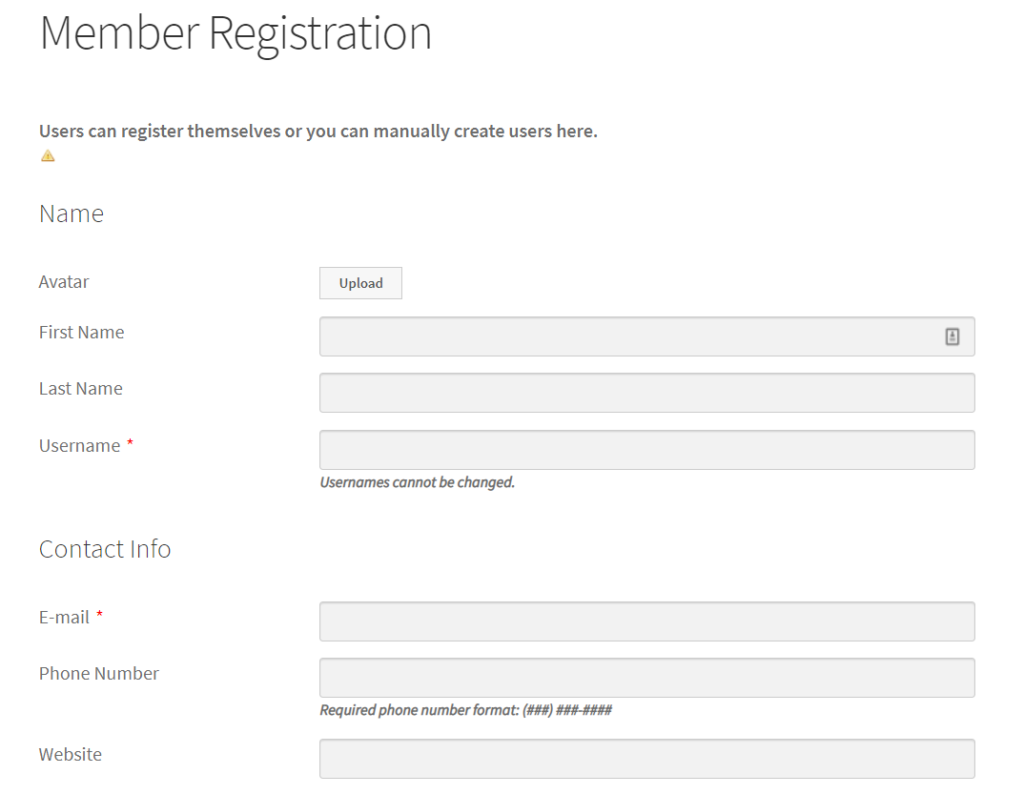
Creating Multiple Registration Forms
The Multiple Registration Forms module from Profile Builder allows you to add multiple front-end user registration forms with different form fields for certain user roles. In other words, you can assign registrants a specific user role automatically after they fill out the form.
For example, let’s say you have two registration forms – Member Registration and Event Registration. People who fill out the Member Registration form will be assigned the Members user role. And people who fill out the Event Registration form will be assigned the Attendee user role.
You’ll also probably want to collect different information from each type upon registration.

The first thing you need to do is enable the Multiple Registration Forms module by heading over to Profile Builder > Modules. Once that’s done, you can configure the After Registration… meta box for each form.

Profile Builder Pro lets you configure the following settings for each form you create:
- Set Role – the user role that will be assigned to people after they fill out this form.
- Automatically Log In – whether or not to automatically log in to the registrant or not.
- Redirect – whether to redirect the registrant to a different page or not.
After you publish the form, you’ll see a form shortcode that can be used to add the form to any page you’d like.
Setup Multiple Edit Profile Forms
If you use the Multiple Registration Forms module to add multiple custom WordPress registration forms to your site’s front-end, you might also consider giving each user type the option to access and edit their profile information.
For this, you will need to set up multiple edit profile forms. The easiest way to do this is by using the Multiple Edit Profile module.

Once you’ve enabled the Multiple Edit Profile module from the Profile Builder > Modules screen, head over to Profile Builder > Edit-profile Form to add a new form and choose which fields users can view and / or modify from the front-end.

After publishing, you’ll see a form shortcode that can be used to add the edit profile form to any page you’d like. You can use to show only certain fields / information under the user profile, as well as control which fields they can modify and which remain unchanged.
Drag and drop to reorder User Profile Fields
One of the neat features on offer with Profile Builder Pro is that you can simply drag and drop form fields into place to reorder them. This lets you change the default order of how form fields appear on the front-end.
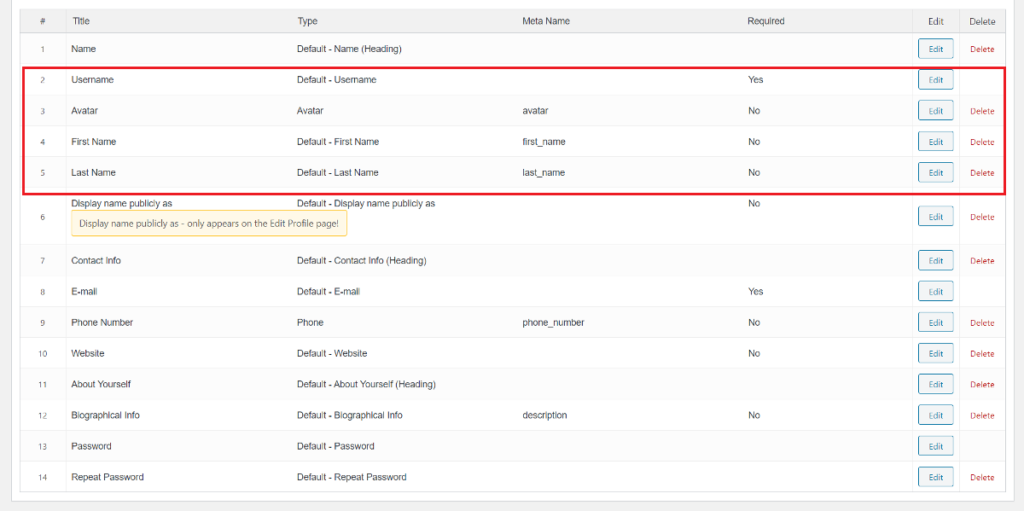

For example, let’s say the registration form asks users to enter their username before their first name and last name.
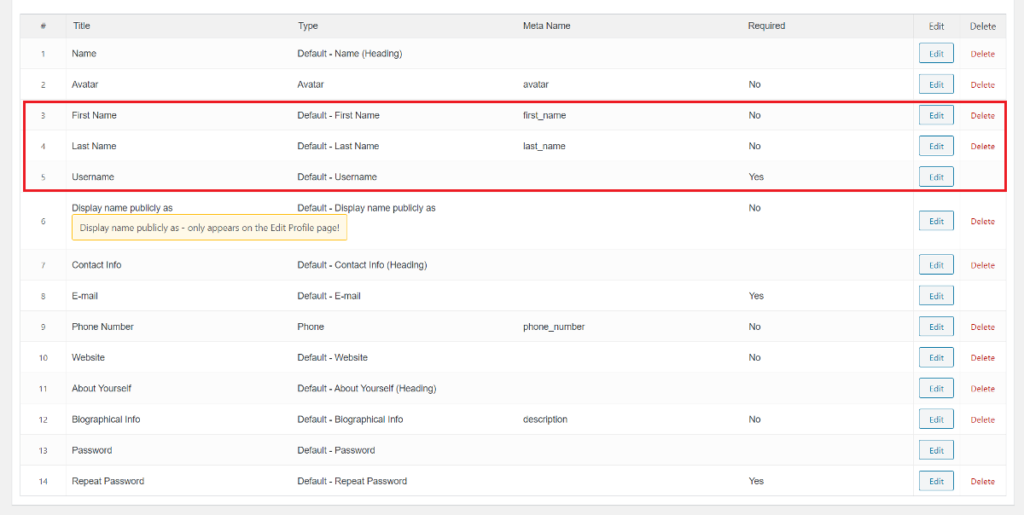
You can simply drag and drop the username form field so that it appears after the first name and last name fields.
Add Email Confirmation for User Registration
The Profile Builder Pro plugin also lets you set up email confirmation for new user registrations. This is great for making sure people sign up with their real email addresses. It also helps you protect against bots and spam accounts.
To enable the email confirmation feature, head over to Profile Builder > Settings from the admin panel. Next, click on the General Settings tab. From here, change the “Email Confirmation” Activated option to Yes using the dropdown.

Once that’s done, choose a page to redirect registrants to once they’ve confirmed their email account.
Click the Save Changes button to proceed.
Enable Conditional Logic for Custom WordPress Registration Form Fields
Using the Profile Builder Pro plugin to create custom WordPress registration forms, you also have the option to configure conditional logic for certain fields. In other words, you can choose to show or hide fields based on the user’s input. You can apply conditional logic to user fields when you’re adding in new fields or editing existing ones.
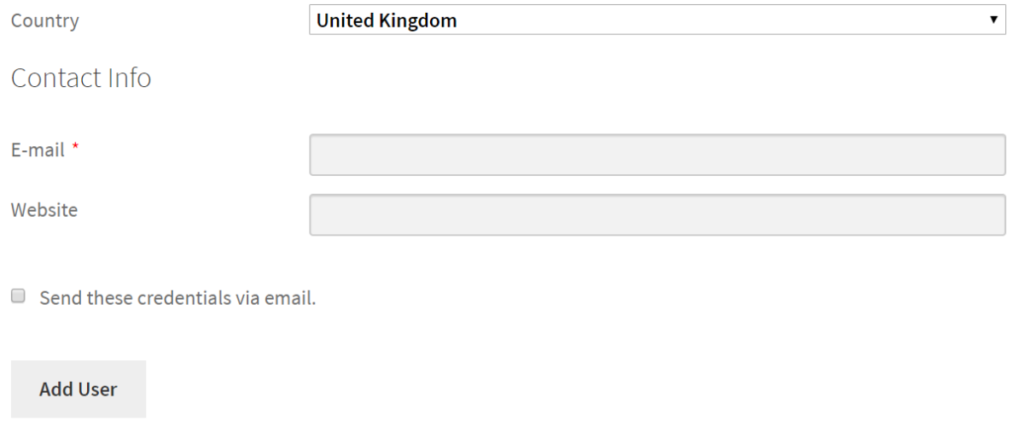
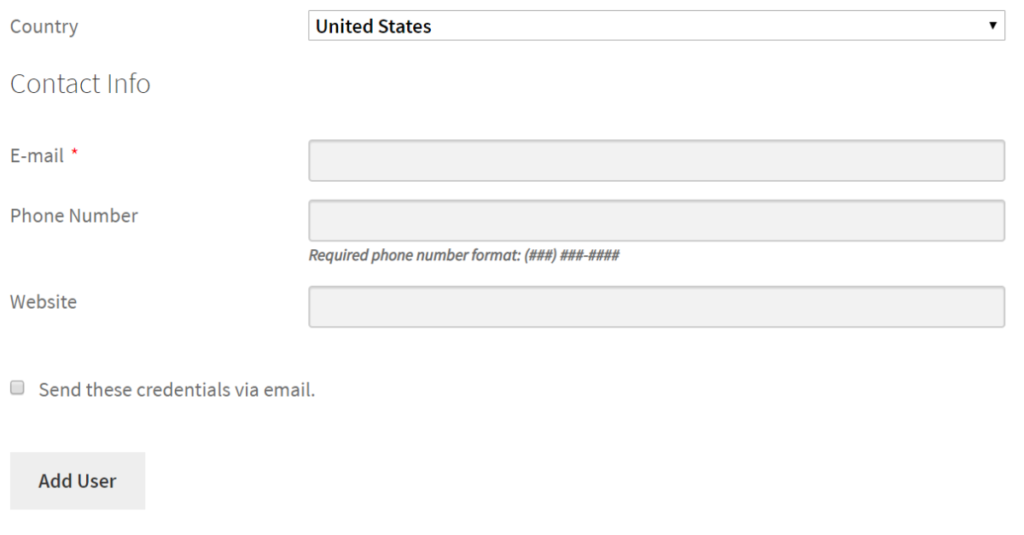
Let’s say you want to apply conditional logic to the Phone Number field. First, tick the checkbox next to the Conditional Logic option to enable conditional logic. Once that’s done, you will be able to configure conditional logic rules.
For example, if we want to ask users for their phone number only if they live in the United States, we would set the conditional rules as follows:

The phone number field only appears when the user selects the United States using the Country field.
Using conditional logic you can implement dynamic front-end custom WordPress registration forms for your users.
Adding Repeater Fields to Custom WordPress Registration Form
Profile Builder Pro’s Repeater Fields module allows you to add front-end repeater fields (or groups of fields) to your forms.
This is really handy when you need your users to insert similar information, multiple times.

To get started, head over to Profile Builder > Modules to enable Repeater Fields. Next, go to Profile Builder > Form Fields to add a Repeater field and configure its field properties.

From here, you can choose to limit the number of fields that registrants generate by using the Limit option. You can also use the Repeated field group option to manage the form field that will be repeated. Alternatively, you can choose to repeat a group of fields.

It will look something like this on the front-end:

Start creating Custom WordPress Registration Forms for your site
The Profile Builder Pro plugin makes it incredibly easy for website owners to setup custom WordPress registration forms with custom fields.
Profile Builder Pro
Create beautiful front-end registration and profile forms with custom fields. Setup member directories, custom redirects, cutomize user emails & more using the all in one user management plugin.
Get the pluginIt also comes with a variety of advanced features like conditional logic, repeater fields, and email confirmation allowing you to deliver an enhanced user experience and boost conversions.
The multiple registration forms and edit profile forms offer incredible flexibility for setting up different registration forms with different fields, allowing you to collect different information from different user roles.
Ready to create custom WordPress registration forms for your website? Get the Profile Builder Pro plugin today!
The post How to Create a Custom WordPress Registration Form appeared first on Cozmoslabs.