Profile Builder – WooCommerce Sync add-on makes it super easy to add custom user fields to the WooCommerce checkout page, as well as manage the Customer Shipping and Billing Address fields.
It allows you to extend the WooCommerce checkout page, with support for all Profile Builder Pro custom field types, including conditional logic and repeater fields.
In this tutorial, we’ll focus on how to add conditional logic fields to the WooCommerce checkout page.
Uses for Conditional Logic on WooCommerce Checkout
The most frequent use cases for adding conditional logic revolve around:
- offering options that require extra user information to be collected
- collecting different type of information for different type of users
Basically, every time you need to show some extra fields (or groups of fields) according to the user choice, conditional logic is the way to go.
For the purpose of this tutorial, we’ll be using the following plugins:
- WooCommerce – the popular eCommerce plugin, for adding a shop functionality to your website
- Profile Builder (Hobbyist or Pro) – for creating and managing the custom user fields that we want to add to WooCommerce checkout
- WooCommerce Sync add-on (included in Profile Builder premium versions) – for adding conditional logic fields to WooCommerce Checkout page
Adding Conditional Logic Fields to WooCommerce Checkout
Assuming you’ve already installed and configured WooCommerce to fit your online store needs, we’ll proceed to installing and setting up Profile Builder and WooSync add-on.
Both are installed just like any other WordPress plugin.

Make sure to activate both Profile Builder and WooSync add-on, then navigate to Profile Builder -> Manage Fields.
Here you have a list of all the custom user fields which can be added to front-end forms (like Register or Edit Profile) created with Profile Builder.
From the “Manage Fields” interface you can add all types of custom user fields and also choose which ones you wish to display on the WooCommerce checkout form. For the purpose of this tutorial let’s say you’re selling tickets for an event and as an organizer you want to know if the participants have any dietary restrictions.
On the WooCommerce checkout page, when users purchase a ticket, we’ll ask the users if they have any dietary restrictions and only if they answer “Yes”, we’ll display a list of options to pick from, like “Vegan”, “Gluten free” or “Lactose free”.
For this, under Manage Fields page, click “Add New“ field, select Radio. Enter a field title like “Do you have any dietary restrictions?” and two options: “Yes” and “No”. Then make sure to tick the checkbox stating “Display on WooCommerce Checkout“. This will make sure this field is displayed on the Checkout page.

Next, we’ll add a new Select field, that will allow users to select their specific dietary restrictions. We’ll set it up to display conditionally, only if the user selects “Yes” to “Do you have any dietary restrictions?”. You can add multiple conditions for each field that has conditional logic enabled, as well as pick from several conditional logic options.

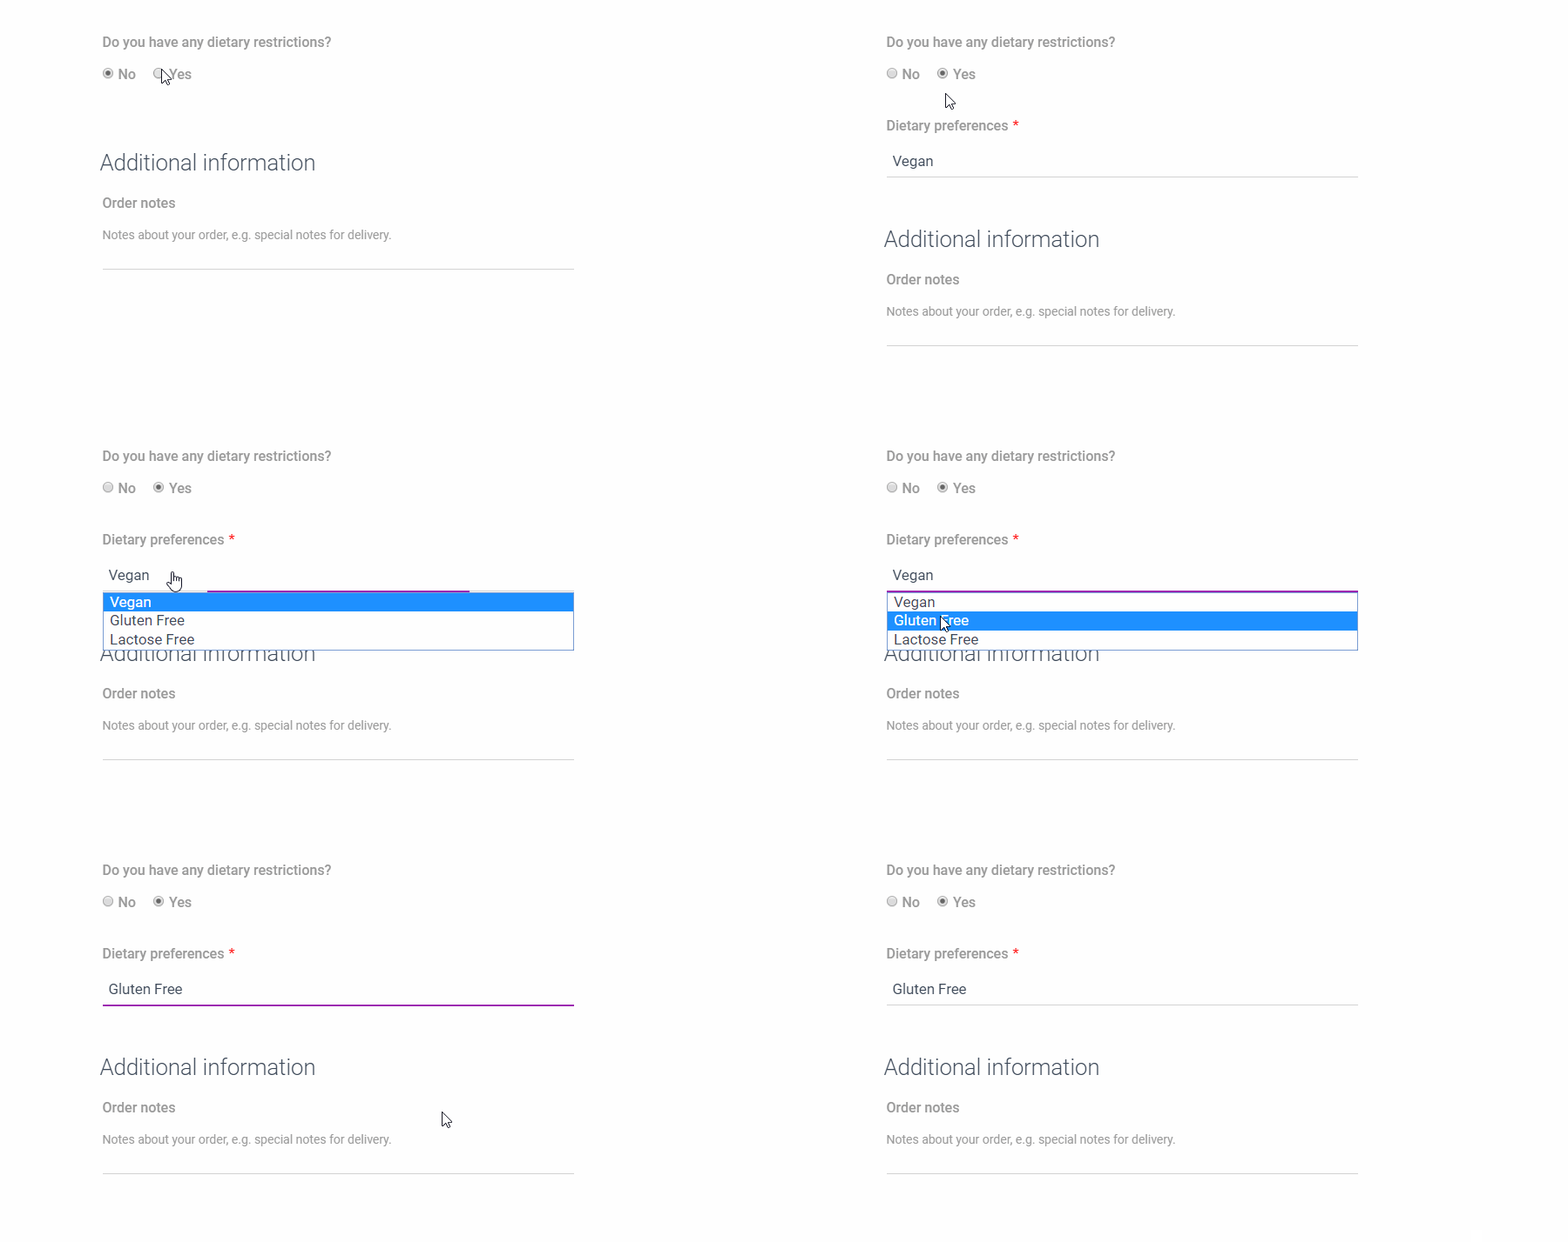
After adding these fields let’s see how the WooCommerce Checkout form will look like.

As you notice, you’ll first see the dietary restrictions question. If the user selects “Yes”, he can then select a dietary preference.
This was a basic example of adding conditional logic fields to WooCommerce checkout with the help of Profile Builder and WooSync add-on. This allows you to remove extra clutter from forms and make sure you capture all the necessary data when required.
You can expand on the example above and add as many conditional logic fields as your project needs to the WooCommerce Checkout page.
The post Add Conditional Logic Fields to WooCommerce Checkout Page appeared first on Cozmoslabs.
